
Homemade Modelling Dough
Just like playdough, you can make your own modelling dough at home. Modelling dough is for older children, who have already had lots of experience with playdough and want to make creations they can keep. A good homemade modelling dough for older children will be firmer and more durable, allowing their creations to dry and harden. Air-dry modelling dough is lightweight and dries naturally over time, perfect for intricate designs. Salt dough, on the other hand, is denser and baked to harden, providing a more solid and long-lasting result.
(I have kept cups in the recipe without adding grams and millilitres. The important thing is keeping the proportions the same, so it doesn’t matter if you don’t have an exact American cup measure.)
Here’s a simple air-dry modelling dough recipe that works well:
Homemade Modelling Dough Recipe
Ingredients:
- 2 cups baking soda (bicarbonate of soda)
- 1 cup cornstarch (cornflour)
- 1 ¼ cups water
- 1 tbsp vegetable oil (optional, for smoother texture)
- Food colouring or paint (optional)
Instructions:
- Mix Dry Ingredients: In a saucepan, combine the baking soda and cornstarch. Stir to distribute evenly.
- Add Liquid: Gradually stir in the water and oil (if using), ensuring there are no lumps.
- Cook the Dough: Heat the mixture over medium heat, stirring constantly. It will start to bubble and thicken. Keep stirring until it forms a dough-like consistency and pulls away from the sides of the pan (about 3-5 minutes).
- Cool & Knead: Remove from heat and let it cool slightly. When it’s warm but safe to handle, knead it for a few minutes until smooth.
- Use or Store:
-
- If using immediately, shape your creations!
- If storing, wrap tightly in cling film and keep in an airtight container to prevent drying out.
- It keeps well at room temperature for about 1–2 weeks.
- If it starts to dry, knead in a few drops of water or a little vegetable oil to restore its softness.
- Drying & Hardening:
- Let creations air-dry for 24-48 hours on a baking tray lined with baking paper.
- Turn them over halfway through drying for even hardening.
- Once dry, they can be painted with acrylic paints and sealed with a clear varnish for durability.
Creating a simple flower:
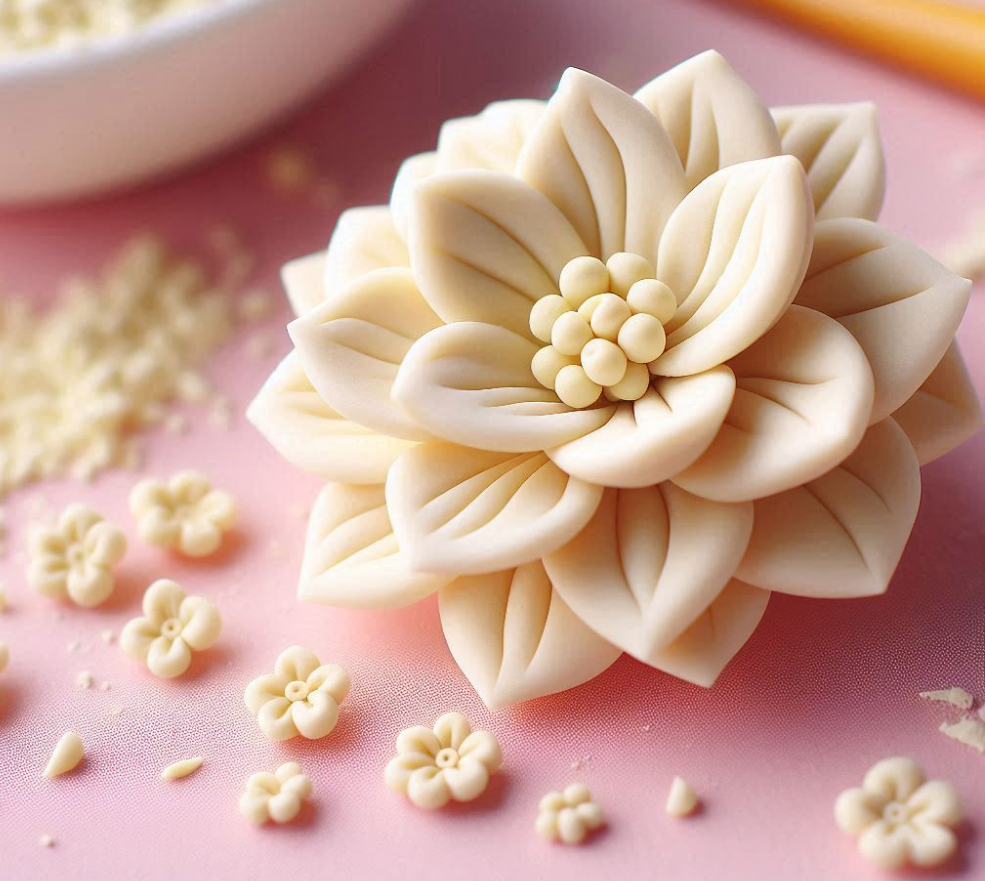
Instructions:
- Roll small balls of dough for petals.
- Flatten each ball into a petal shape.
- Arrange the petals in a circle, pressing them together in the center.
- Add a small dough ball or several very small dough balls in the centre as the flower’s core.
- Let it air dry completely, then paint and seal.
Salt Dough Recipe
Ingredients:
- 2 cups plain flour
- 1 cup fine salt (the finer, the smoother the dough)
- ¾ cup water (adjust as needed)
- 1 tbsp vegetable oil (optional, for elasticity)
Instructions:
- Mix Dry Ingredients – In a large bowl, combine the flour and salt.
- Add Water Gradually – Pour in the water slowly while stirring until the mixture starts forming a dough. If it’s too sticky, add a little more flour; if too dry, add a few drops of water.
- Knead the Dough – Knead for about 5–10 minutes until smooth and elastic.
- Use or Store –
-
- If using immediately, shape your creations!
- If storing, wrap tightly in cling film and keep in an airtight container at room temperature for up to a week.
Drying & Hardening Salt Dough:
Air-Dry Method:
- Leave the creations in a warm, dry place for 2–3 days, turning occasionally.
- Best for thin or small items to prevent cracking.
Oven-Bake Method (Faster & Stronger):
- Preheat the oven to 90–100°C (200–210°F).
- Place shapes on a baking tray lined with parchment paper.
- Bake for 1–3 hours, depending on thickness (check every 30 minutes).
- When dry, let them cool completely before painting or sealing.
Decorating & Sealing:
- Paint with acrylics or poster paint once fully dry.
- Seal with clear varnish, Mod Podge, or PVA glue for a glossy, durable finish.
Here are a few fun salt dough project ideas for older children:
How to Make 3D Salt Dough Figures & Animals
Basic Tips for Sculpting:
✔ Use small amounts of dough at a time – Large pieces take too long to dry and may crack.
✔ Add details with tools – Use a toothpick, skewer, or butter knife to create fur, scales, or facial features.
✔ Attach pieces with water – Lightly dampen the joining edges to help parts stick together.
✔ Use a foil core for bigger models – This prevents cracking and makes them lighter.
Step-by-Step for Simple 3D Figures
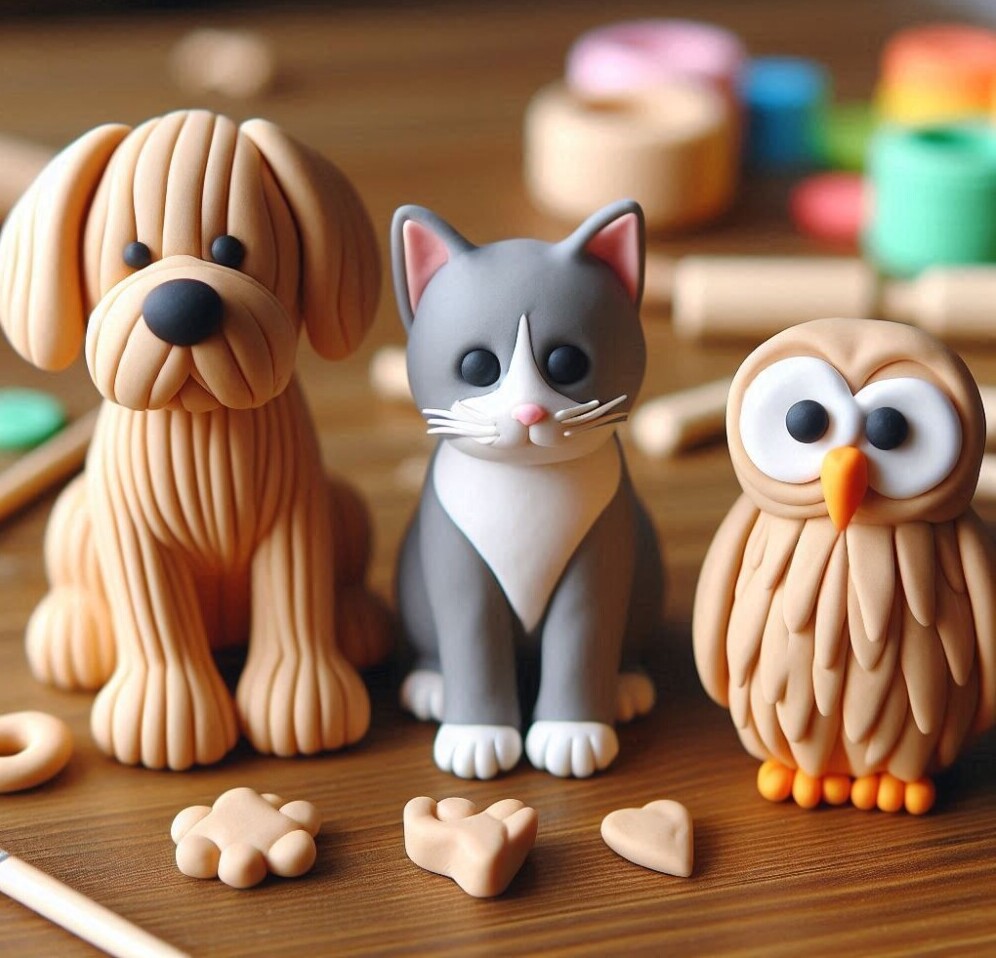
1. Making a Basic Animal (e.g., a Cat, Dog, or Owl)
- Head & Body – Roll small balls of dough for the head and body. Slightly flatten them where they join and use water to attach.
- Ears & Tail – Shape small triangles or strips of dough for ears and tails. Press onto the head/body using a bit of water.
- Eyes & Nose – Use a toothpick to poke small eye holes or press in tiny balls of dough. For a nose, shape a tiny oval and press gently.
- Texture – Create fur or feathers using a fork or toothpick for a more realistic look.
➡ Drying: Air-dry for 1-2 days before baking (to prevent cracking). Bake at 90°C (200°F) for 1–2 hours, depending on size.
Finishing & Decorating
✔ Paint with acrylics or poster paint once fully dry.
✔ Seal with Mod Podge, PVA glue, or clear varnish for a glossy and durable finish.
✔ Glue on extras (like googly eyes, felt, or glitter) for a fun touch.
Here is a detailed step-by-step guide for making a salt dough dog, a salt dough cat and a salt dough owl!
Salt Dough Dog 🐶
What You Need:
- Salt dough
- Toothpick or skewer for details
- Water and paintbrush (for attaching parts)
- Acrylic paints and varnish (for finishing)
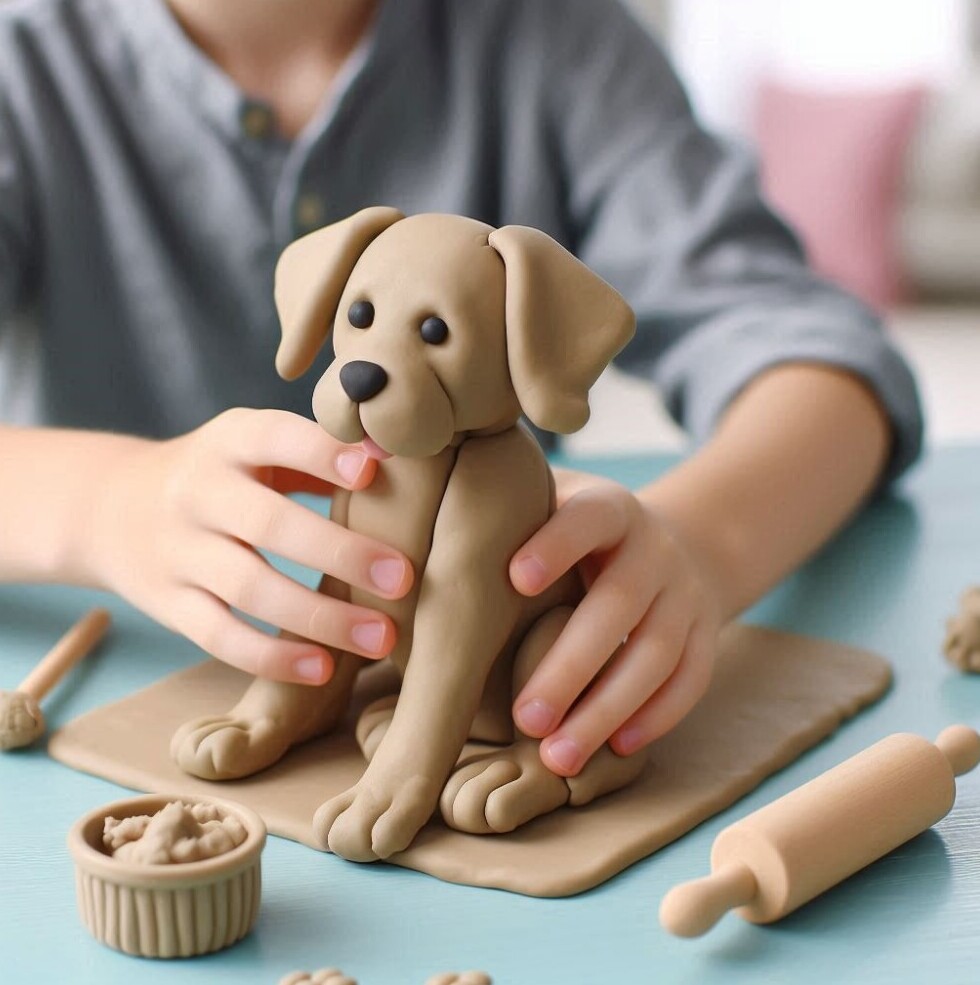
Steps to Make a 3D Salt Dough Dog:
1. Shape the Body
- Roll a thick oval for the body. Flatten slightly at the bottom so it sits well.
2. Make the Head
- Roll a small ball for the head.
- Pinch out a small snout or roll a tiny oval and attach it to the face with a little water.
- Use a toothpick to make nostrils and a small mouth line.
3. Add Ears
- Roll two small triangles or floppy ovals for ears.
- Attach them to the top sides of the head with a little water.
4. Legs and Tail
- Roll four small sausages for the legs. Shape the front ones slightly longer.
- Attach two legs to the front and two at the sides for stability.
- Use a toothpick to press in paw details (small lines for toes).
- Roll a thin tail and attach it at the back.
5. Eyes and Details
- Press small indentations for the eyes and add tiny dough balls if you want raised eyes.
- Use a toothpick to texture fur by gently scratching the surface.
6.Drying:
- Air-dry for 24 hours, then bake at 90°C (200°F) for 1-2 hours.
- Flip halfway through for even drying.
7.Decorating:
- Paint with brown, black, white, or spotted fur patterns.
- Add a red collar or other accessories for fun.
- Seal with clear varnish to protect.
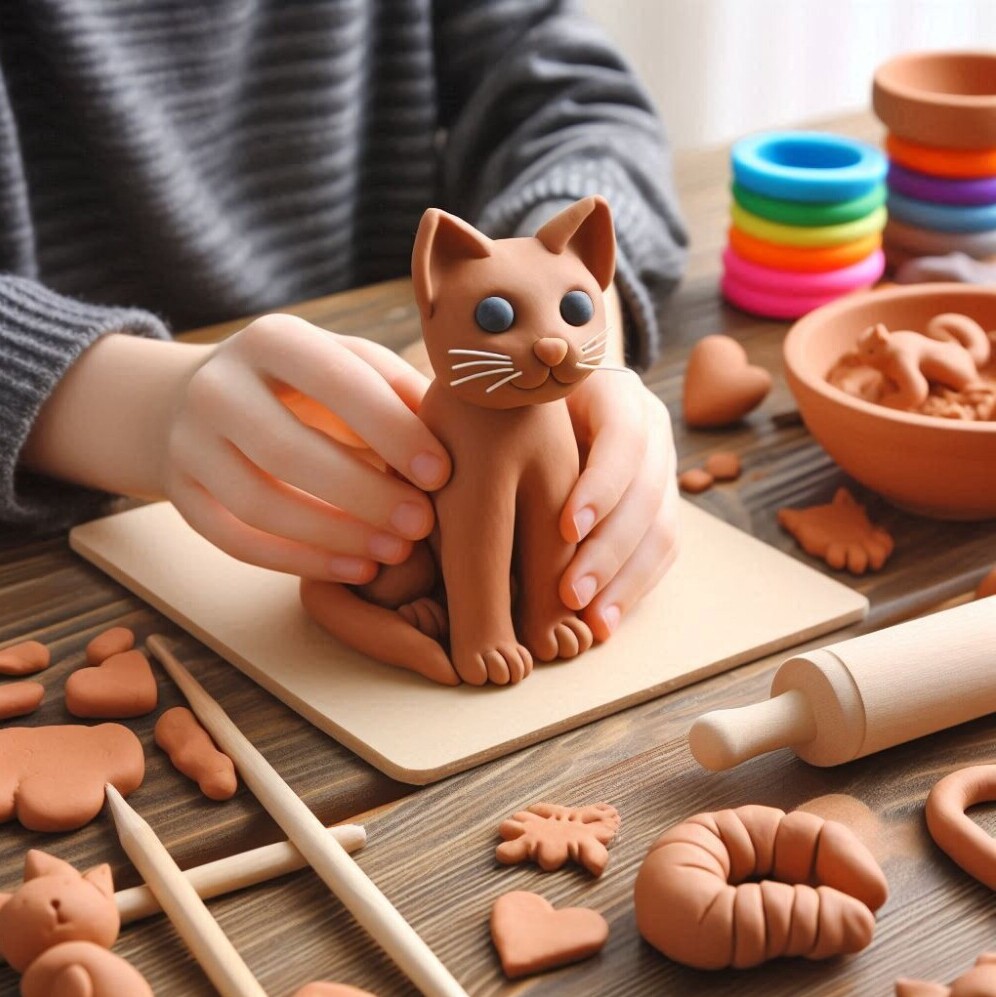
Salt Dough Cat 🐱
What You Need:
- Salt dough
- Toothpick or skewer (for details)
- Water and paintbrush (for attaching parts)
- Acrylic paints & varnish (for finishing)
Steps to Make a 3D Salt Dough Cat
1. Shape the Body
- Roll an egg-shaped body and slightly flatten the bottom.
2. Make the Head
- Roll a smaller ball and slightly flatten it.
- Shape two pointy ears and attach them.
3. Add the Face Details
- Use a toothpick to mark a nose and mouth.
- Press in small eye sockets or add tiny dough balls for raised eyes.
- Create whisker holes by poking small dots with a toothpick.
4. Legs and Tail
- Roll two small sausages for the front paws and attach them to the body.
- Roll a long, curved tail and press it against the side or around the body.
5. Texture and Final Touches
- Use a fork or toothpick to create fur texture.
- If making a fluffy cat, lightly roughen the edges for a softer look.
6. Drying & Baking
- Air-dry for at least 24 hours before baking at 90°C (200°F) for 1-2 hours
7,Decorating
- Paint with tabby stripes, black, white, or ginger fur patterns.
- Use a fine brush to add whiskers and nose details.
- Seal with varnish for protection.
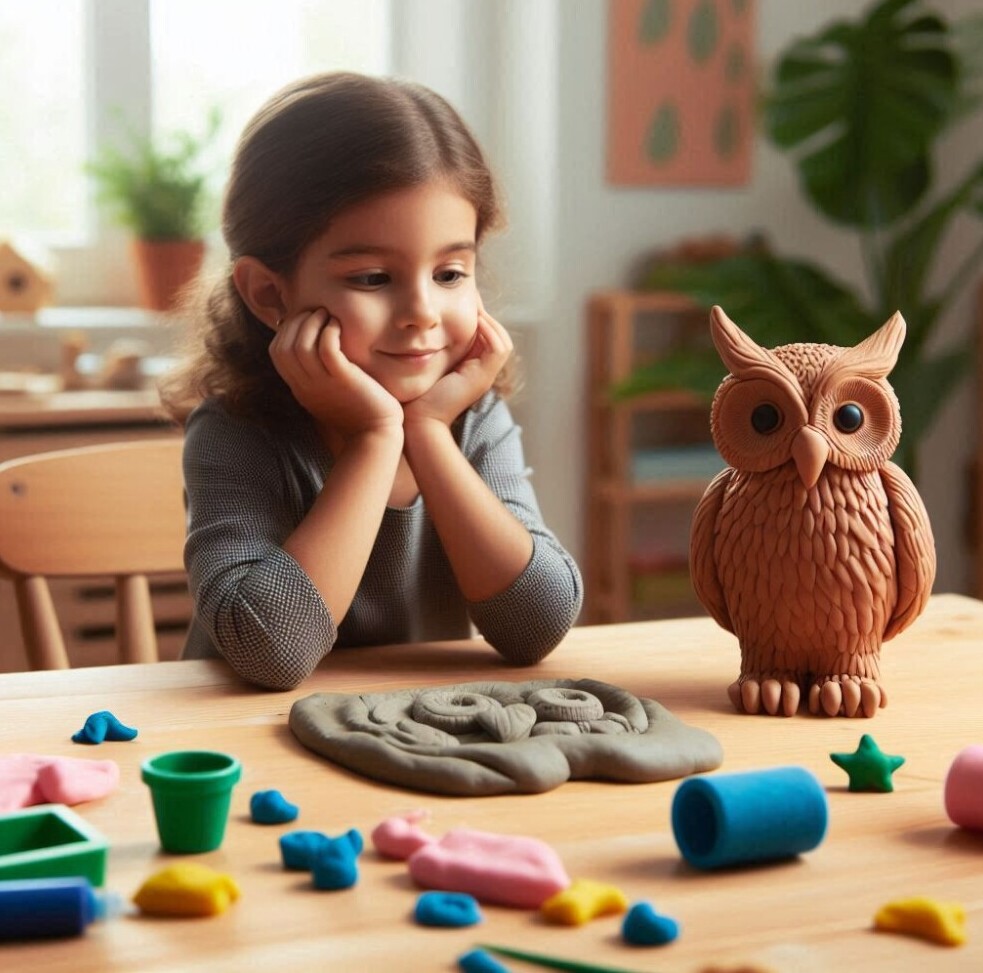
Salt Dough Owl
What You Need:
- Salt dough
- Toothpick or skewer (for details)
- Water and paintbrush (for attaching parts)
- Acrylic paints & varnish (for finishing)
Steps to Make a 3D Salt Dough Owl
1. Shape the Body
- Roll a thick oval of dough for the owl’s body.
- Slightly flatten the bottom so it stands well.
2. Make the Head and Facial Features
- Use your fingers to pinch out two small points at the top for “ear” tufts.
- Roll two small balls for eyes and press them onto the face.
- Use a toothpick to make small circular indentations in each eye for detail.
- Roll a tiny triangle for the beak and attach it between the eyes.
3. Add Wings and Tail
- Roll two oval shapes for wings and press them onto the sides.
- Use a toothpick to add feather details by gently carving lines.
- Roll a small flat piece for the tail and attach it at the back.
4. Texture the Feathers
- Use a fork or toothpick to create soft feather textures on the body and wings.
5. Drying & Baking
- Let the owl air-dry for 24 hours.
- Bake at 90°C (200°F) for 1-2 hours, flipping halfway through.
6.Painting & Finishing
- Paint in brown, grey, white, or golden shades.
- Add black pupils in the eyes and tiny white dots for a reflective effect.
- Use a fine brush to add feather details.
- Seal with a clear varnish to protect your creation.